Click here for my free Kenmore washer transmission replacement guide. otherwise, keep reading this page.
Washer repairs are easy to do and will save you a lot of money by doing it yourself. I suggest that you read these entire instructions before proceeding. It may help to print them out and have them on hand next to the washer while you do the repair.
Note that these repair procedures apply to many different models of top loading direct drive washers, not just Sears Kenmore. The motor coupling shown below will fit most direct-drive (i.e. no belt) washing machines made by Whirlpool since 1984. These include washers produced under the brand names of Whirlpool, KitchenAid, Roper, Estate by Whirlpool, Kirkland Signature (Costco), Inglis (Canadian), Kenmore (Sears) and others.
Problem: Washer fills and drains, but it will not
agitate and it will not spin.
Most likely cause: Broken direct drive motor coupling.
Problem: Washer fills and drains, it will agitate but
it will not spin.
Most likely cause: Broken lid switch
For someone who has never done this before but is reasonably handy, it will take less than one hour to replace a motor coupling. The part can be purchased online for $5 including shipping. Replacing a lid switch takes even less time. The only tools required are a flat blade screwdriver, a Phillips screwdriver, and a 1/4" socket wrench or nut driver.
Important! Do not tilt the washer on its side or turn
it upside down. Doing so will cause transmission oil to leak out, and then you
will have a real problem on your hands and you may have to
replace your transmission.
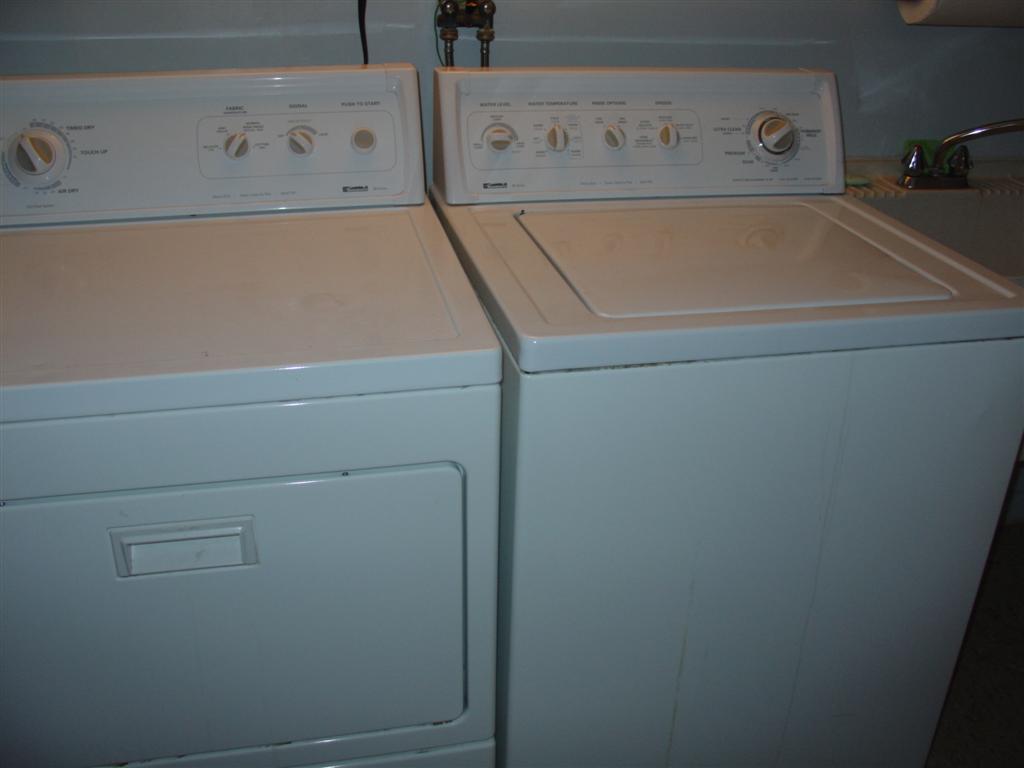
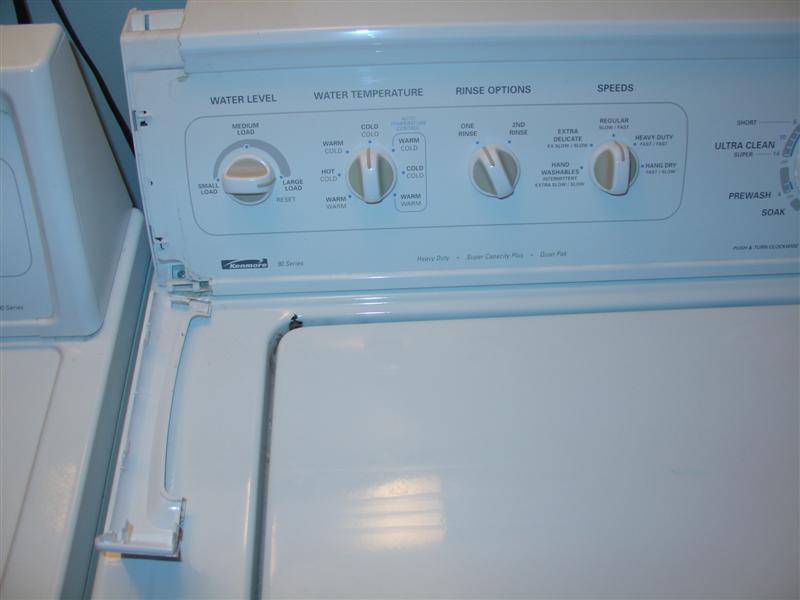
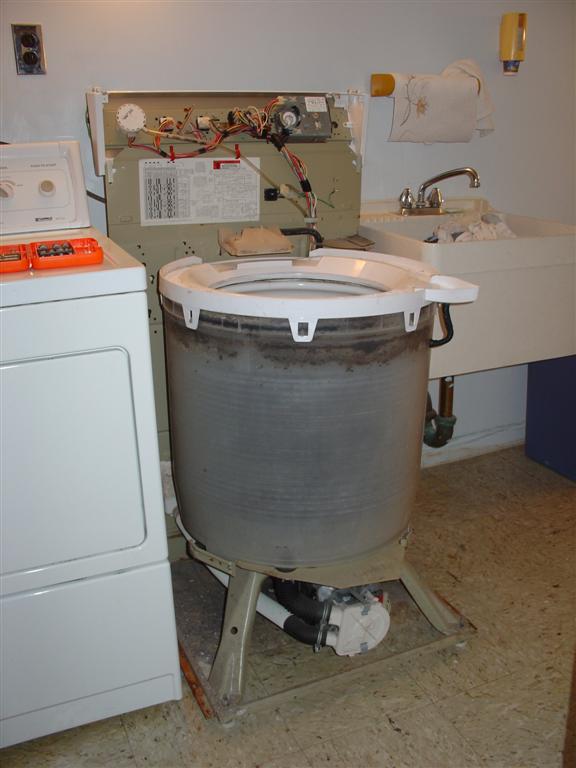
The washing machine shown in these pictures is a Sears Kenmore 90 Series. It is a top loading, direct drive model. It is not belt driven. The model number is 110.26912691. We bought it new from Sears in 1998.
Inside the lid is a toll free telephone number to call if the washer needs service. This sounds very convenient, but there are several problems. One problem is the cost to get a technician to come to your house (at least $60 just to walk in the door), the hourly labor charge (don't ask!), and the cost of parts which are significantly marked up over what you can buy them for online. The other problem is, even if you wanted to pay the outrageous labor charges and waste money on overpriced parts, it could involve waiting two weeks for a service appointment, and who wants to go to a laundromat for two weeks? I don't know about you, but with two teenagers in my house I'm doing about 75 loads of laundry per month. I can't afford to be without my washer for one day let alone a week or two! OK, enough talk, on with the repair!
Click on
any of the images for a larger view.
 |
 |
||||
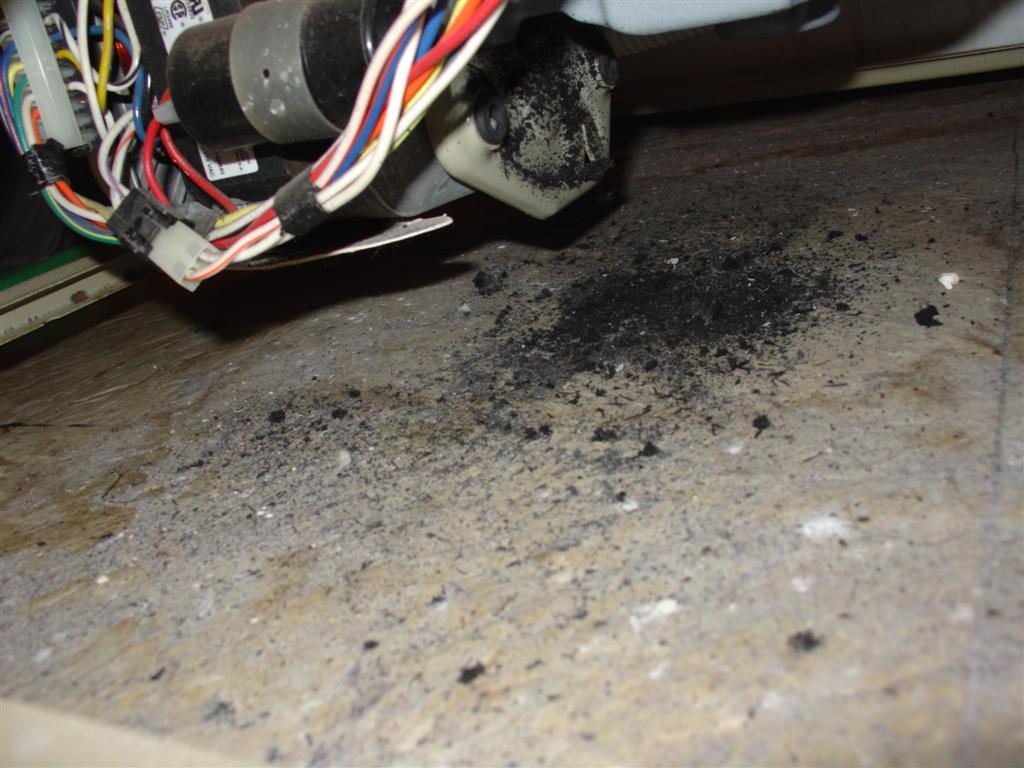
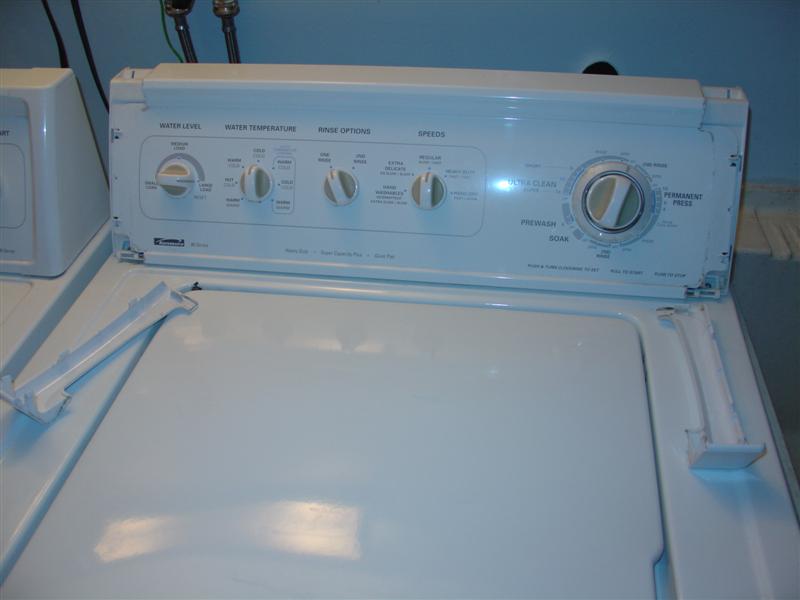
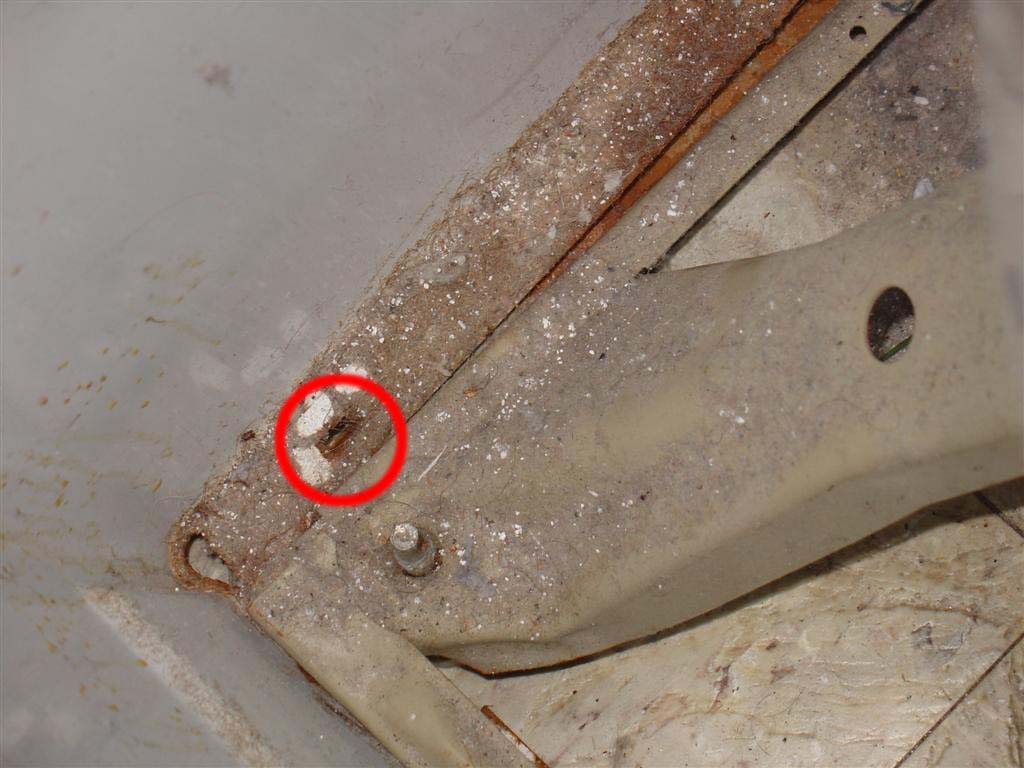
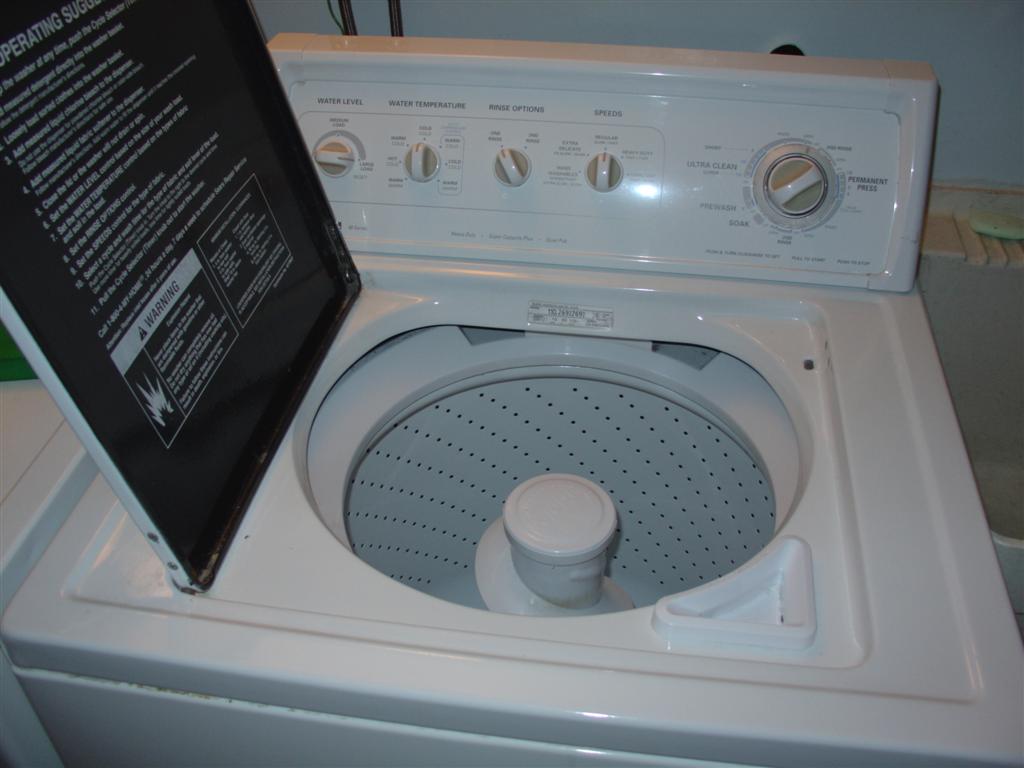
| The classic Sears Kenmore top loading washer on the right, with matching Kenmore front loading dryer on left. The dryer has had its share of problems too, but that deserves its own web page. The most common problem with the washer is it fills and drains and sounds like its washing, but the agitator does not agitate, and the tub does not spin. When you open the washer at the end of the cycle, your clothes are soaking wet. The usual cause is a broken direct drive motor coupling. | Black rubber dust and broken pieces of plastic under the machine are sure signs that the motor coupling is the culprit. According to a Sears technician, the motor coupling is designed to fail to protect the motor or the transmission from catastrophic damage in the event that either one fails. Instead, the inexpensive plastic coupling breaks, preventing more expensive damage to your precious washing machine. | ||||
|
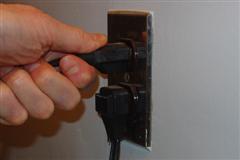
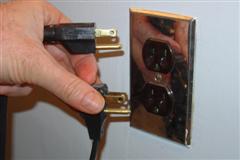
WARNING: Electricity can kill you! Before you do anything else, unplug the machine! |
|||||
 |
 |
||||
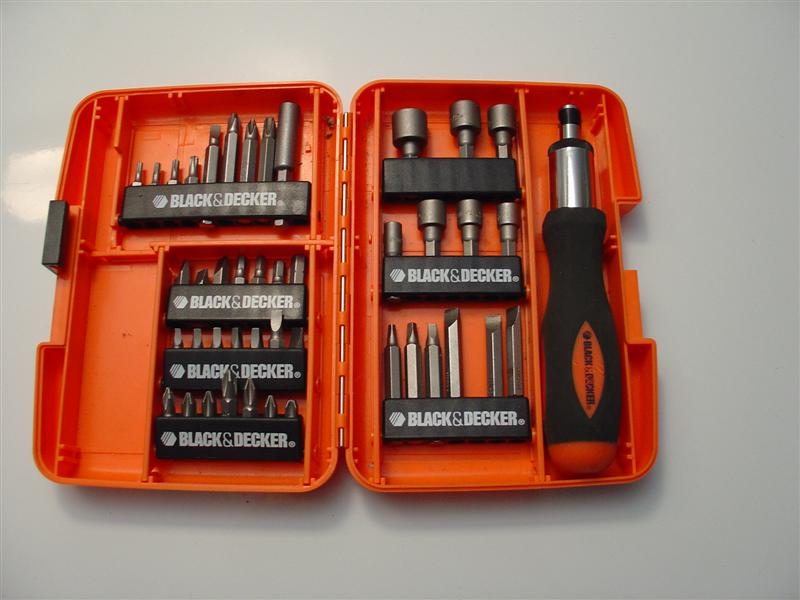 |
Tools required to do this job are a Phillips head screwdriver, flat blade screwdriver, and a 1/4" socket wrench or nut driver. Santa brought me this handy little Black and Decker tool set for Christmas and it contains everything I need to do this job, plus lots of other jobs around the house. It even has several obscure tools such as Torx drivers that you never seem to have in your tool box when you need one. Thanks Santa! | ||||
|
As is so often the case, figuring out how to take the appliance apart is half the battle. There are two pieces of plastic trim, one on each side of the control panel. With your fingers, press down on the top of the trim to disengage the clip (don't use a tool or you may break it). If it doesn't disengage easily, it may just be on tight. I'll repeat, you do not need a tool for this. Try hooking your fingers behind the trim, and then lift up and gently but firmly pull forward while pressing down with your thumb. It is a snap fit and it will just pop off. You don't need gloves to do
this, but I hate
skinning my knuckles, cutting my fingers, and getting grease all over my
hands, so I wear work gloves whenever I do stuff like this. Just a
suggestion. |
 Removing the left side trim. |
||||
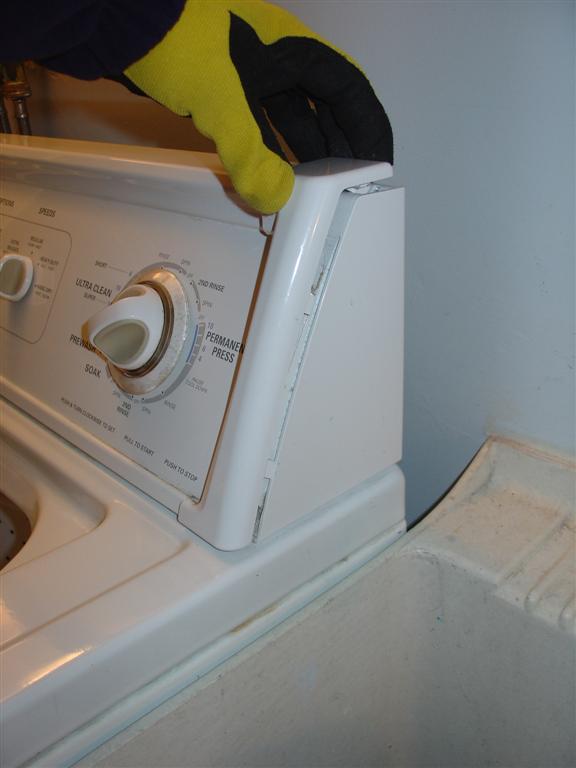 Removing the right side trim. |
|||||
 |
 |
||||
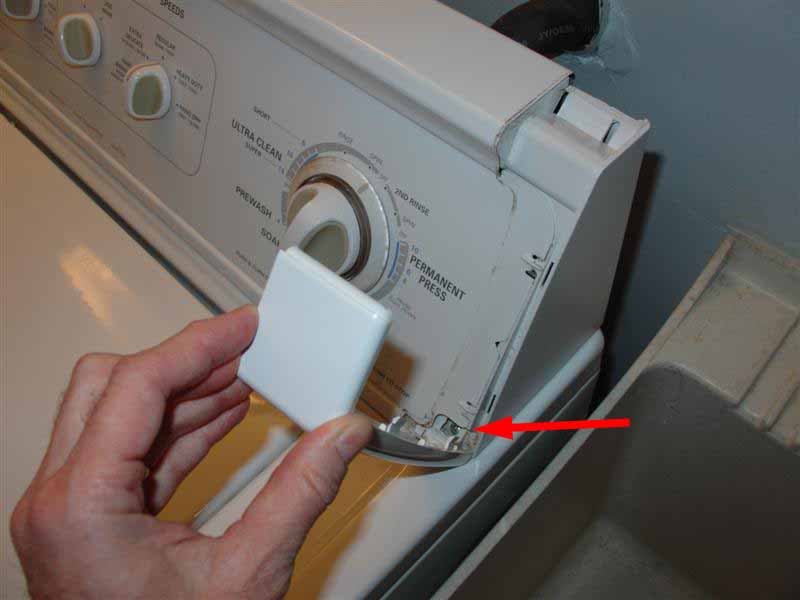
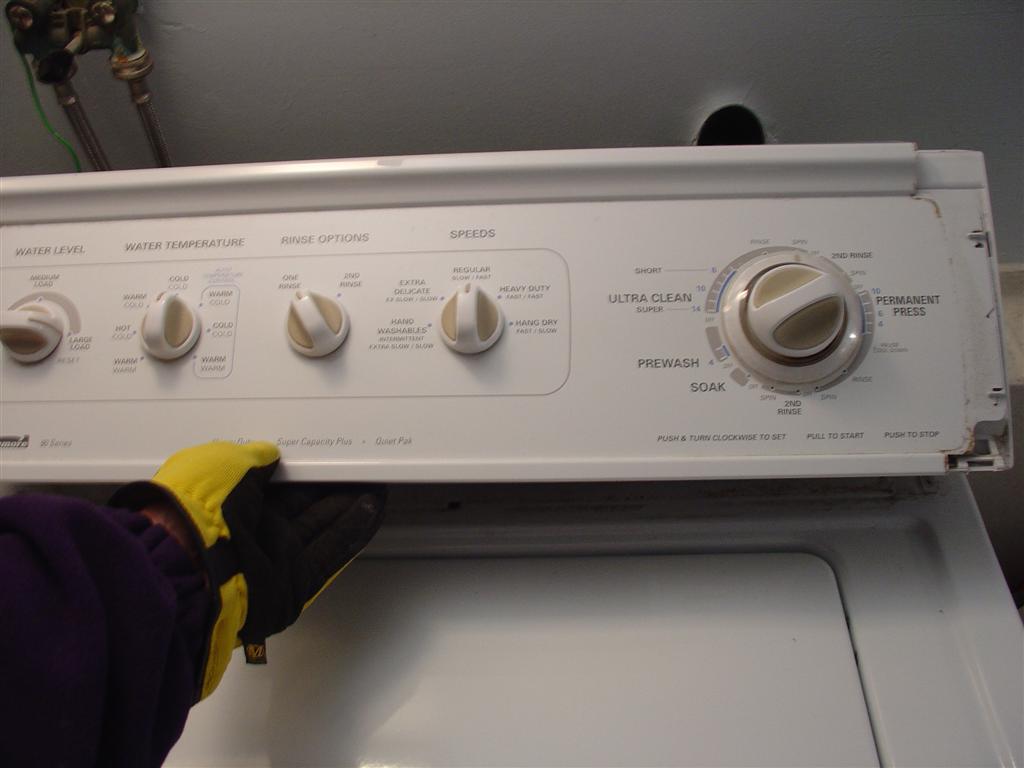
| Tilt the trim back towards you and lift it up. | This exposes a Phillips head screw (one on each side) which holds the control panel to the cabinet. | ||||
 |
Both pieces of trim removed.
Put them someplace where you won't lose them, out of the way where you won't
step on them and break them.
Now it is time to remove the screws. You will need a Phillips screwdriver * for this. * 2011 update: A sharp eyed reader pointed out that these screws are actually Pozidriv, not Phillips. They look almost identical and I'm not going into the differences here. Google if you're interested. If you have a Pozidriv, use it. In a pinch you can use a Phillips if you're careful, and later do yourself a favor and get a Pozidriv for next time. |
||||
 Remove the left side screw. |
 Remove the right side screw. |
||||
 |
 |
||||
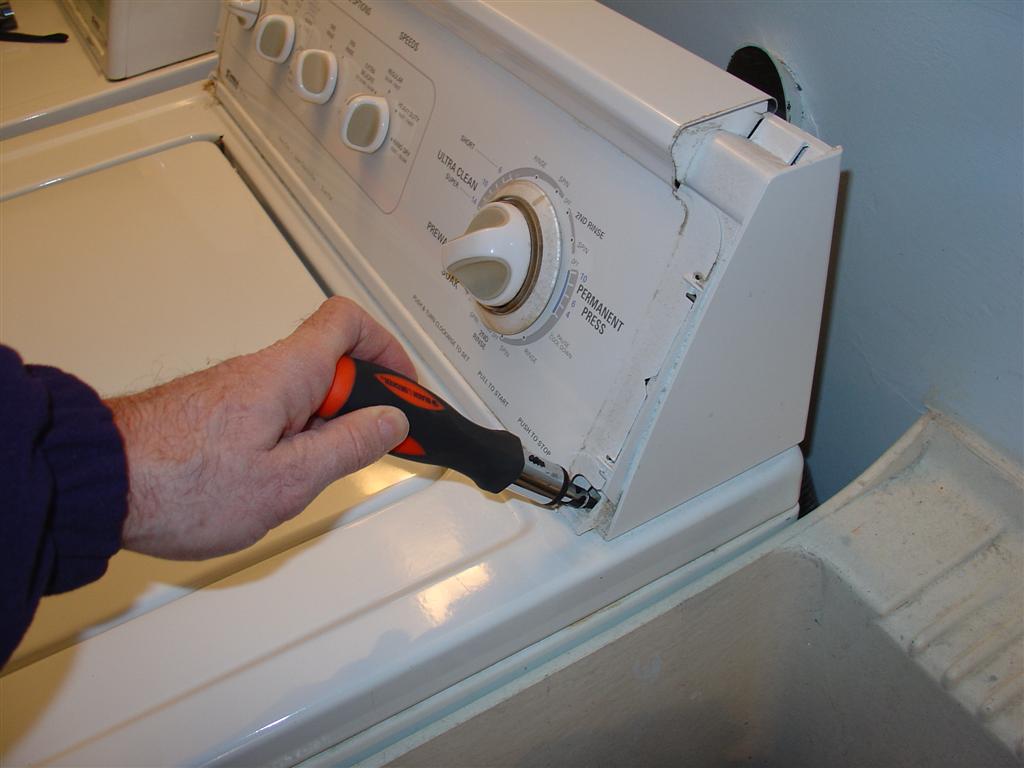
| Put the screws with the trim somewhere you won't lose them. Lift and tilt the control panel back. | Careful. Don't let it just flop back. It will feel very loose, but the control panel is hinged at the back and will stand up on its own. | ||||
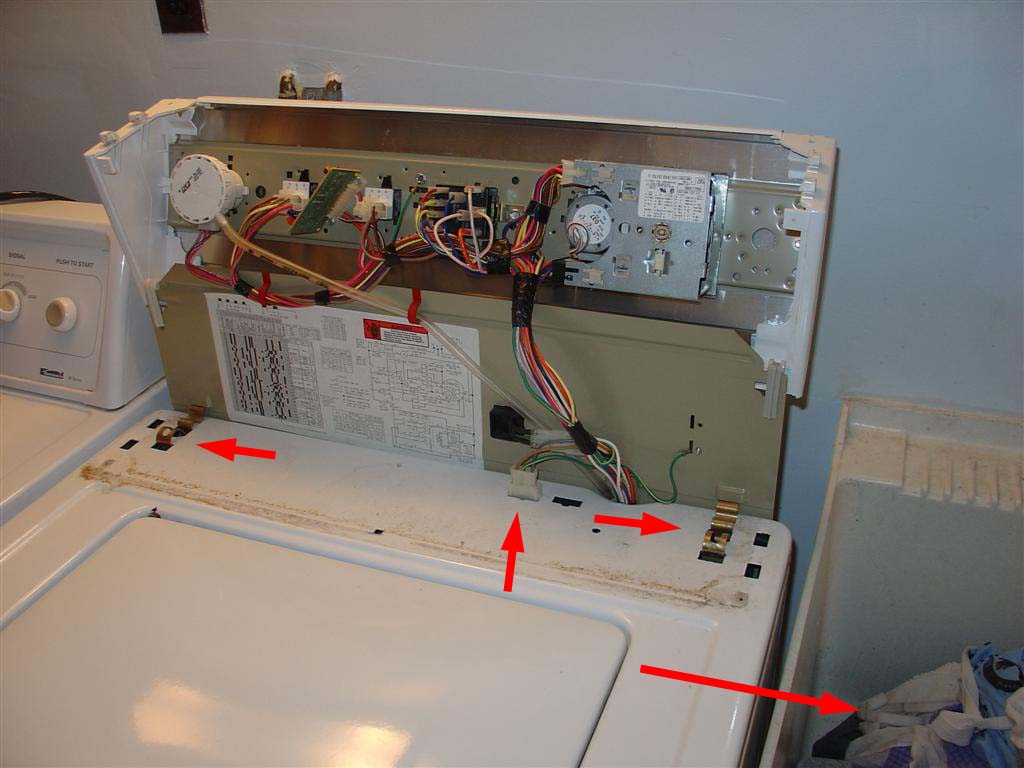 |
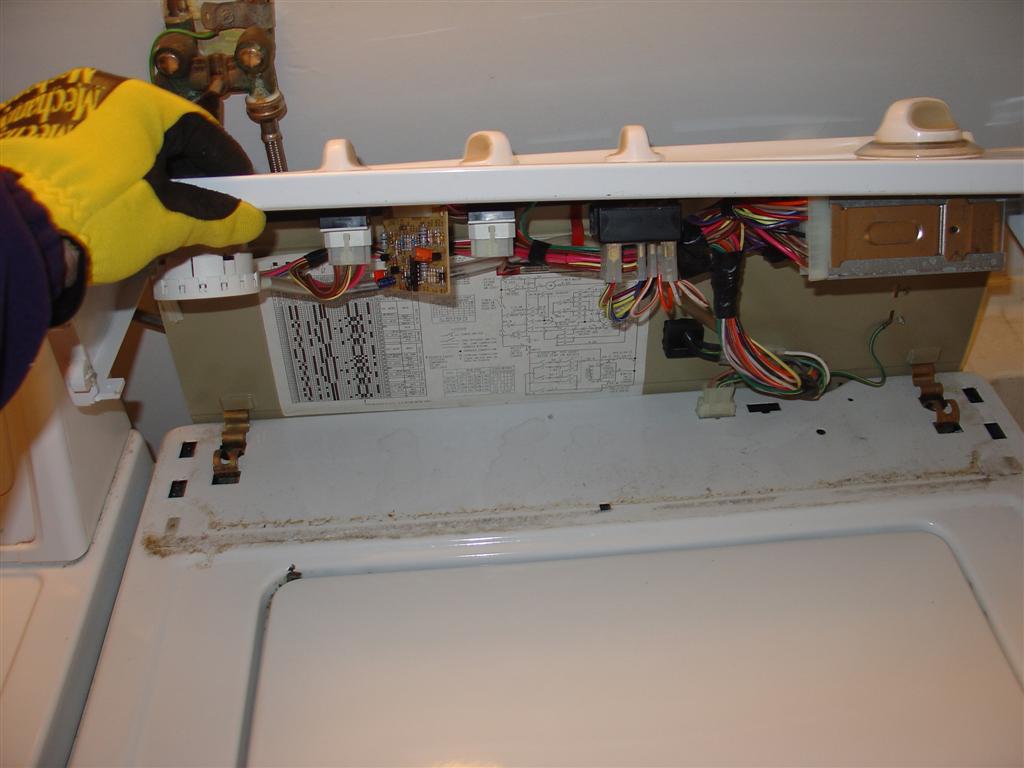
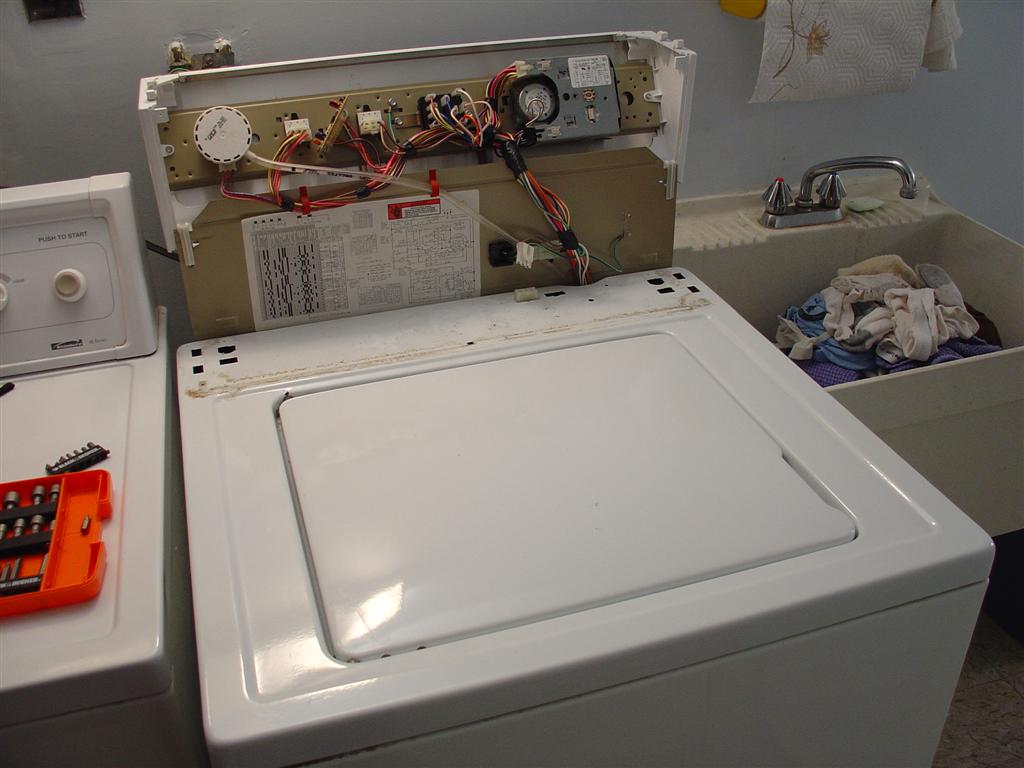
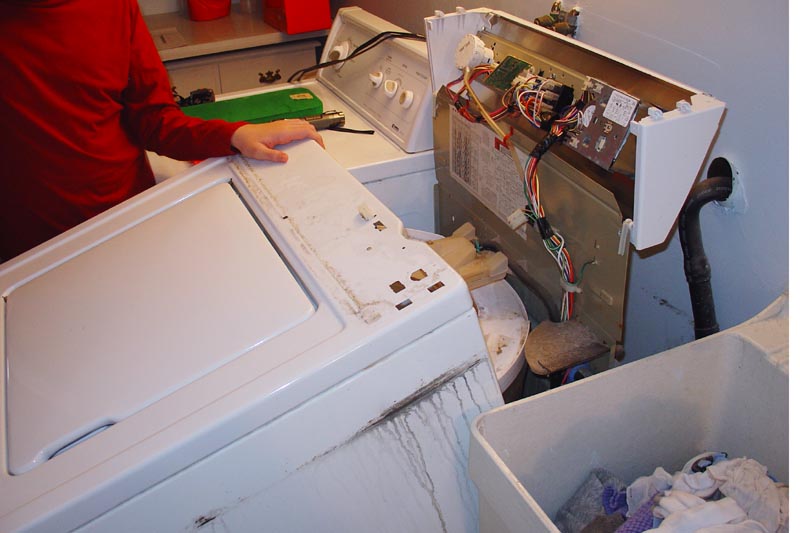
Here the control panel is tilted back.
The next step is to remove the cabinet, which is attached to the back panel
by two metal clips. Click the picture for a larger view highlighting the two
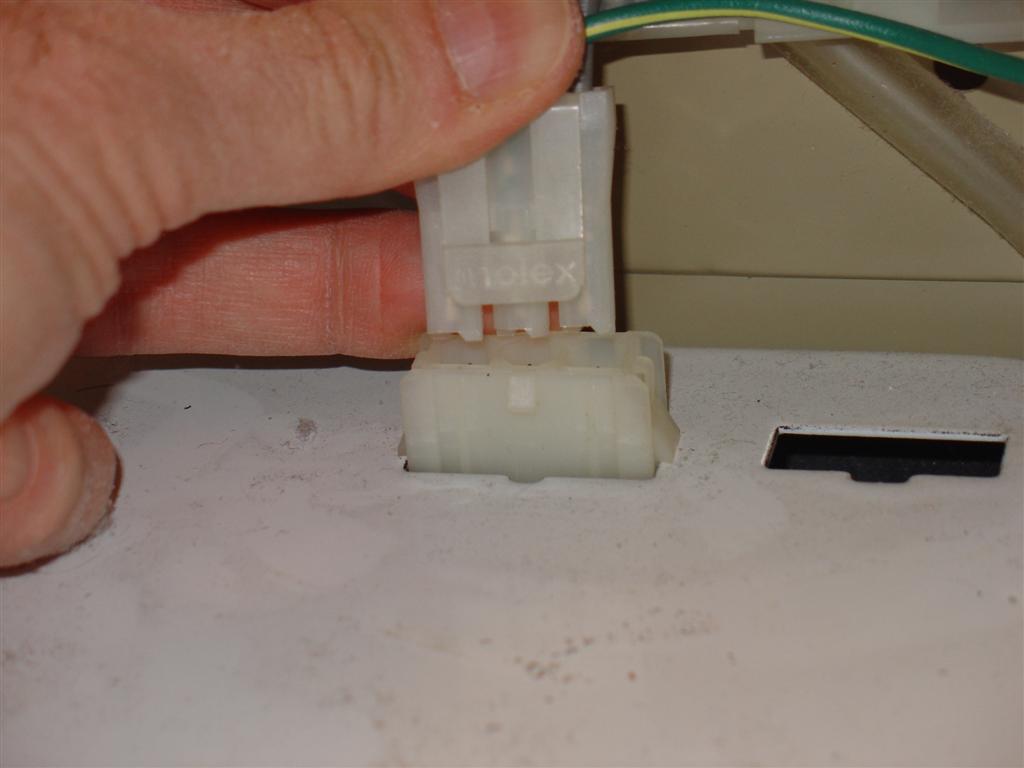
clips to be removed and the electrical connector to be disconnected.
Also highlighted is the sink full of wet clothes waiting for the washer to be repaired. |
||||
 |
 |
||||
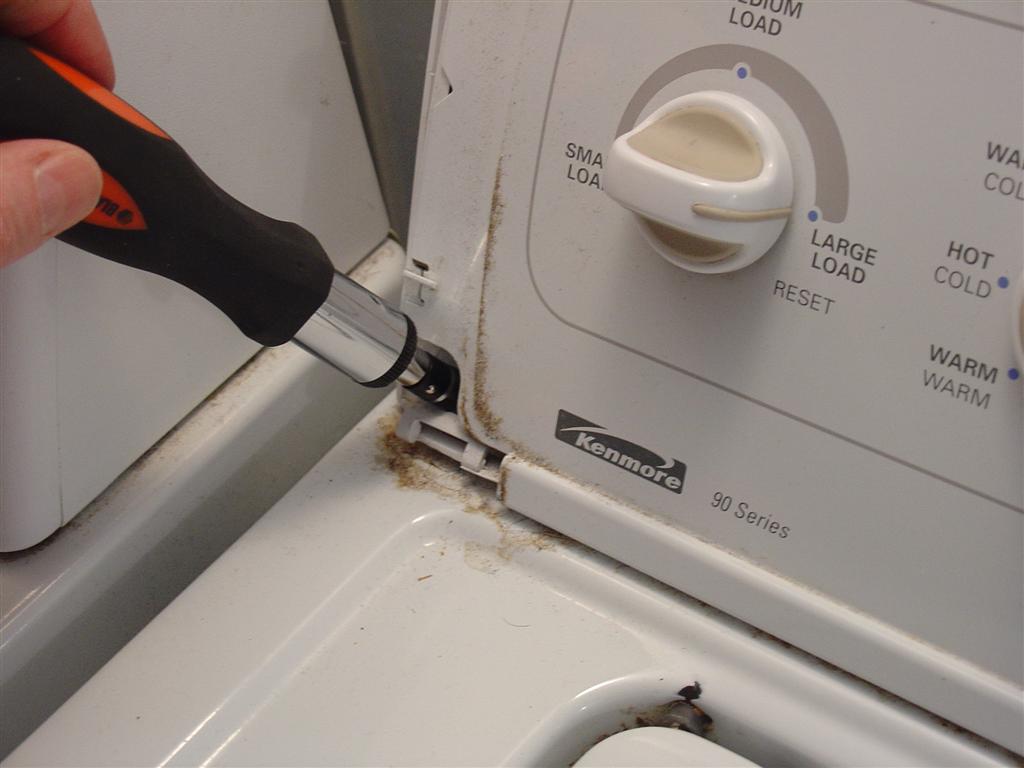
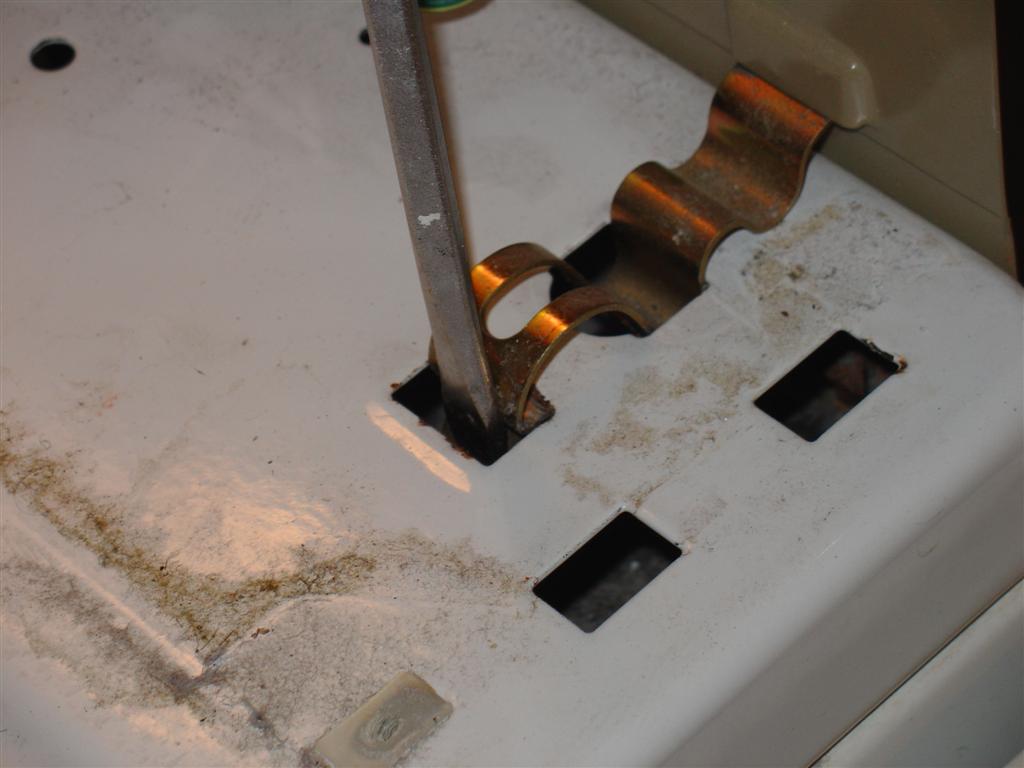
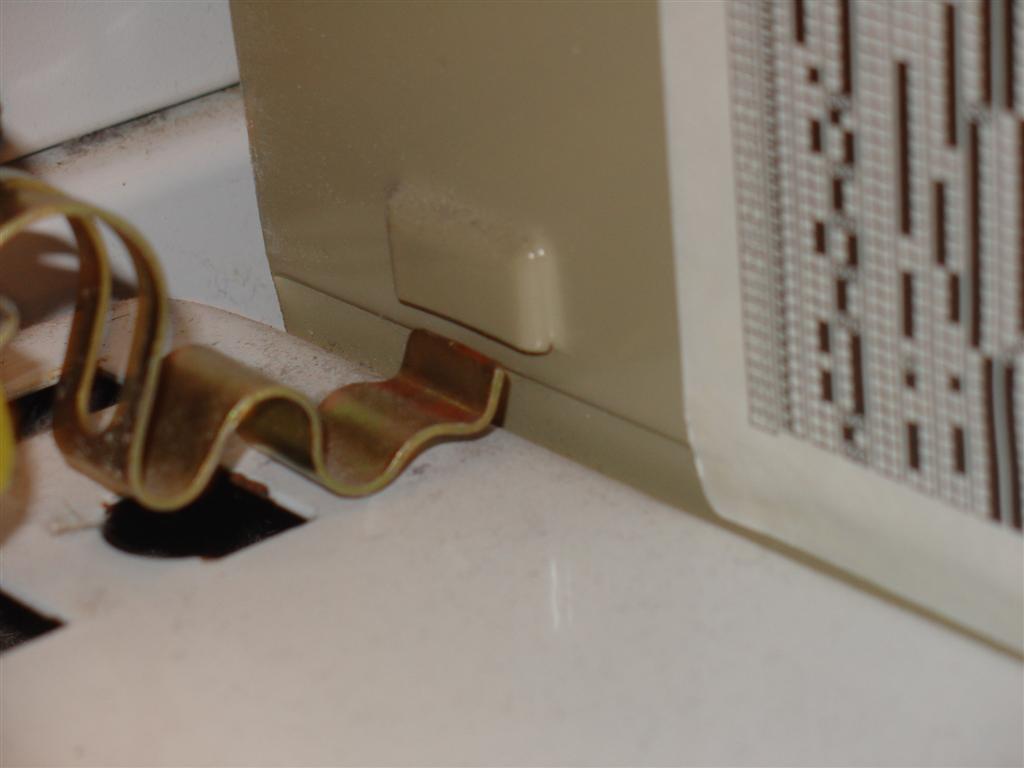
| This is how to remove the two brass
colored clips holding the cabinet to the back of the washer. Insert a flat
bladed screwdriver into the forward slot and push down while simultaneously
pushing the handle of the screwdriver towards the back of the washer. Please excuse all the grunge on my washer. |
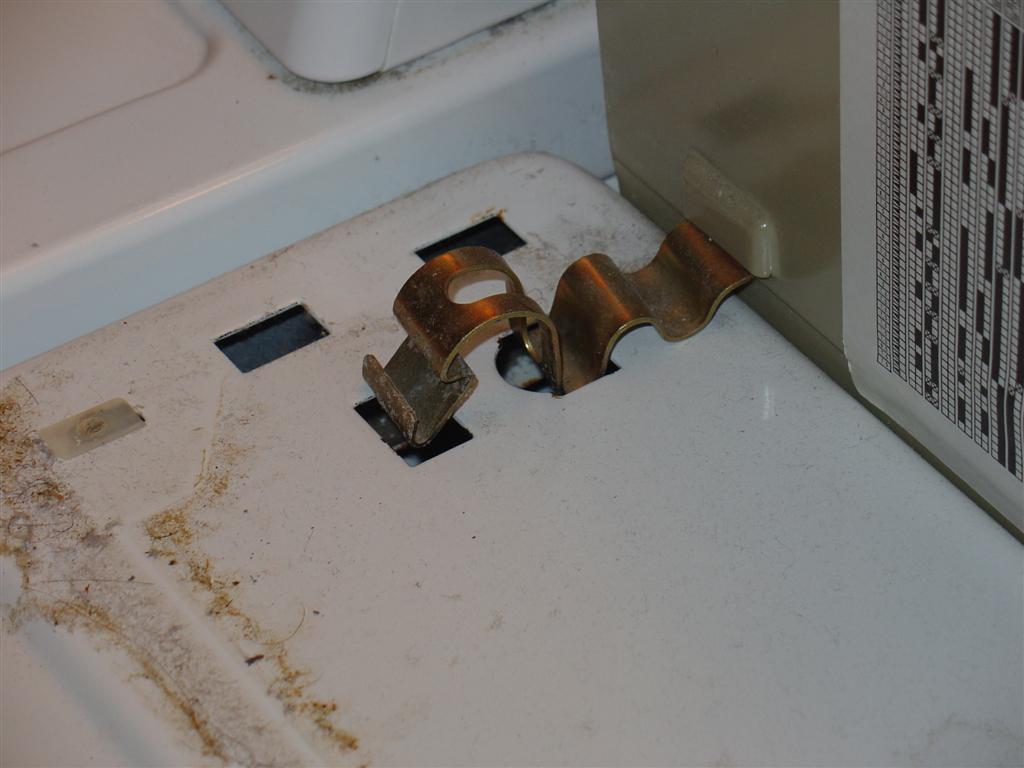
The clip will rotate forward and pop out.
Note how the rear of the clip inserts up into a tab on the back of the
machine. Click here to see this in more detail.
You will need to remember this later when reassembling the washer. Completely remove the clips and put them where you put the trim. |
||||
 |
 |
||||
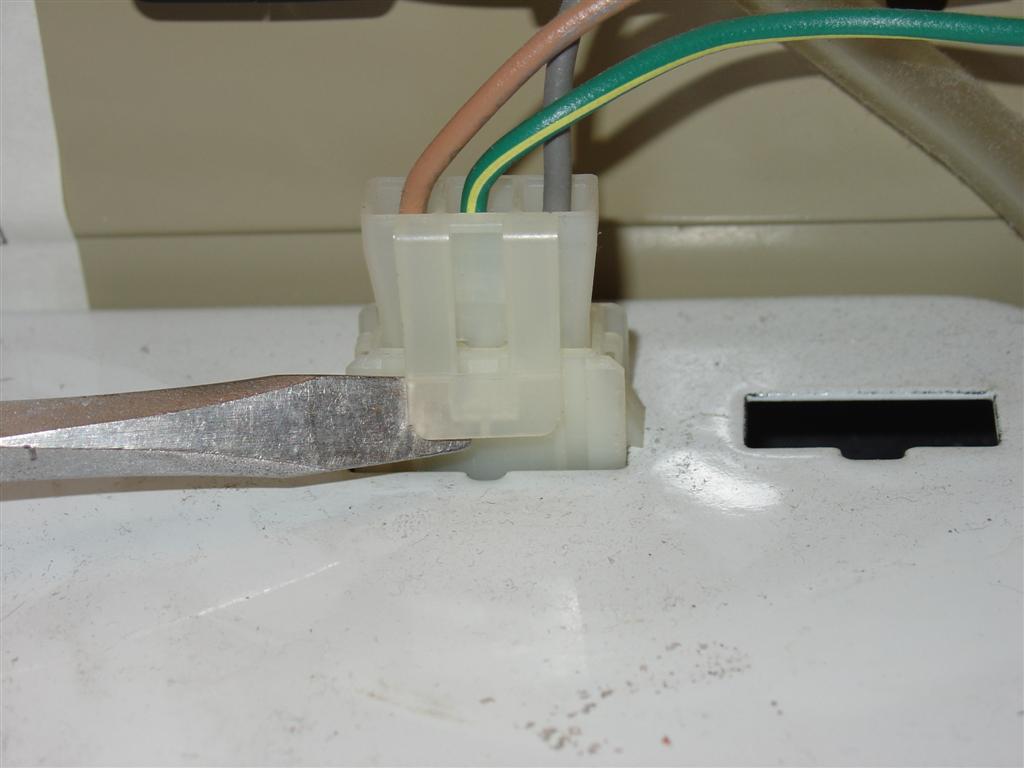
| Disconnect the electrical connector. It may need some gentle persuasion with a screwdriver. Click here to see. | At this point the cabinet is complexly disconnected from the rest of the washer and ready to be removed. | ||||
 Tilt the sheet metal cabinet forward to disengage little metal tabs that hold it in place on the bottom frame of the washer. Don't worry about these now - I'll show this in detail later when we reassemble the washer. |
 |
||||
| Slide the cabinet forward a couple inches. Now it can be lifted up and moved out of the way. It is not heavy but it is a little clumsy. You can certainly move it by yourself but its nice to have a helper for this part. | |||||
 |
 |
||||
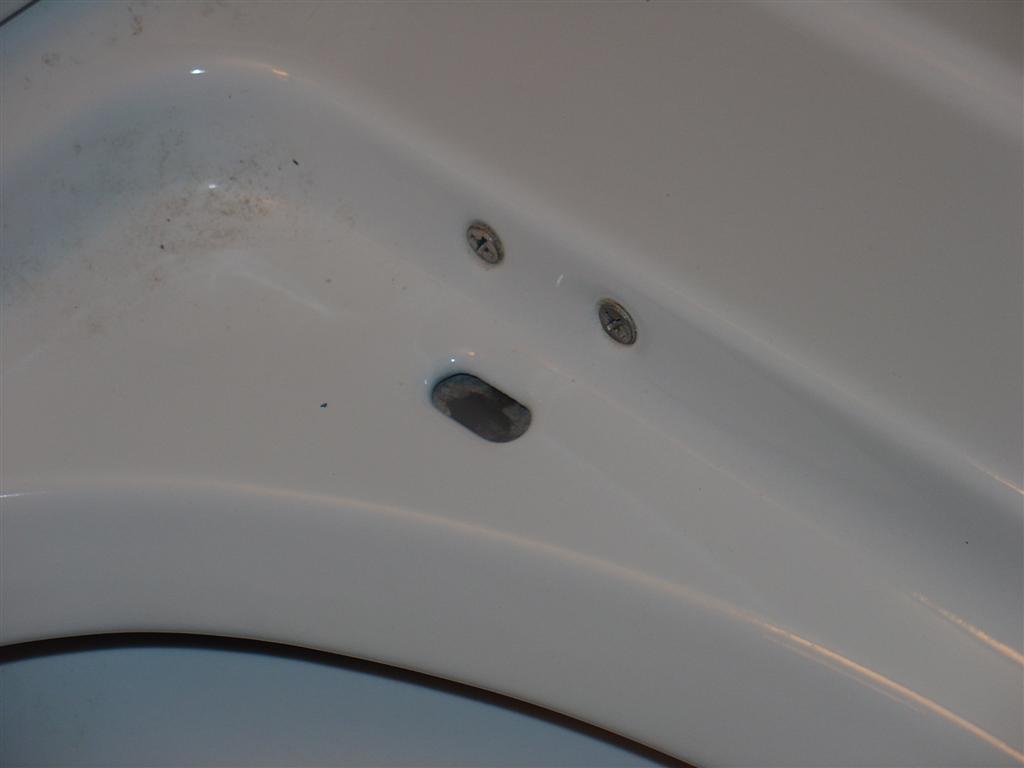
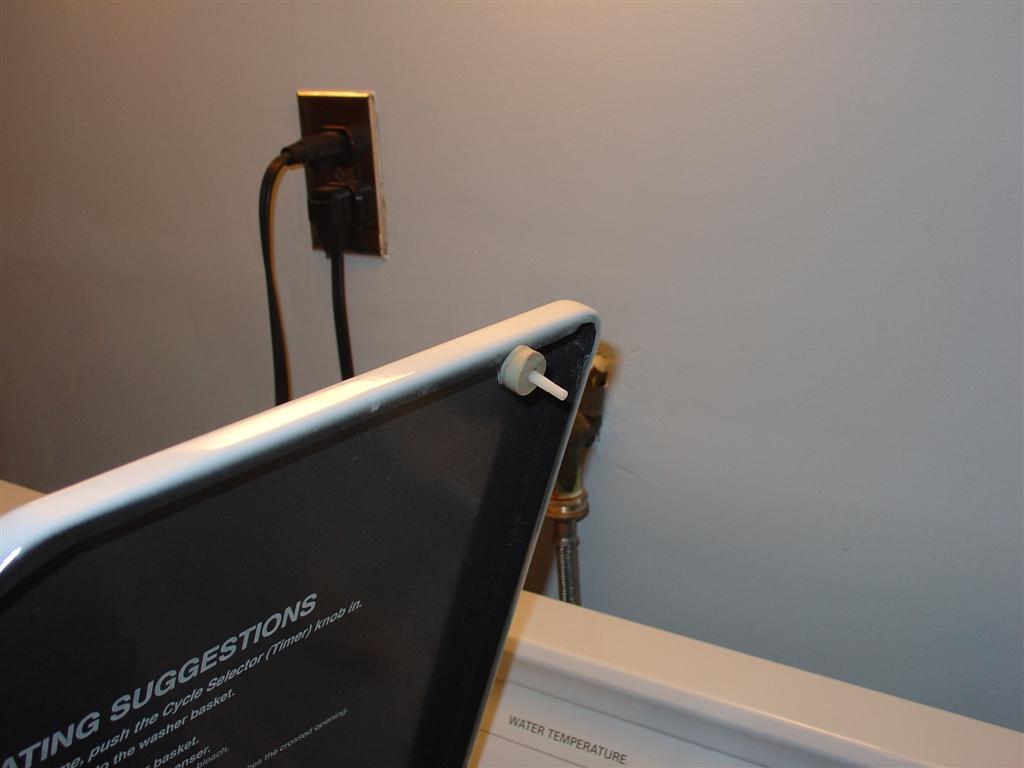
| If the problem is the lid switch, it is mounted inside the cabinet towards the right rear and is held on by two screws. You need to remove the cabinet to access it. If the switch is bad, replace it, and then reassemble the machine. Skip all the following motor coupling instructions and see below for some tips on replacing the cabinet. | Don't assume the lid switch itself is the problem. First make sure that the plastic pin on the lid that engages the lid switch is not broken. A good way to break this pin is to slam the lid. | ||||
 |
 |
||||
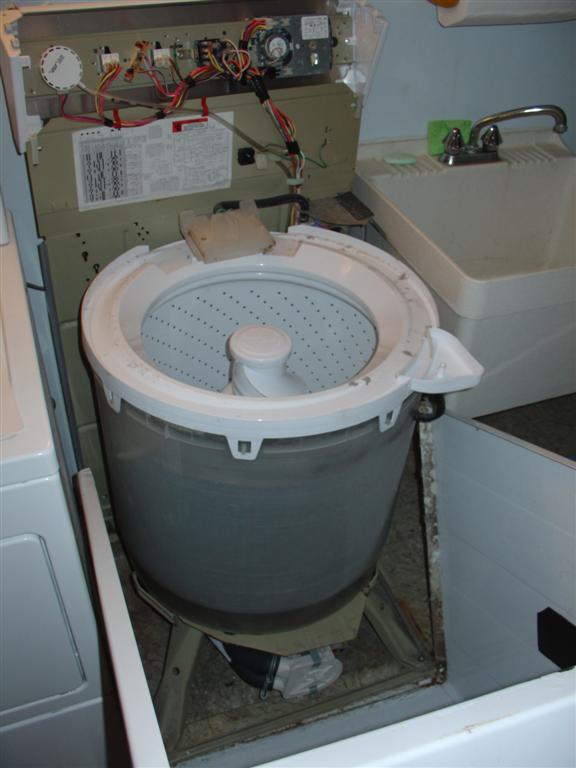
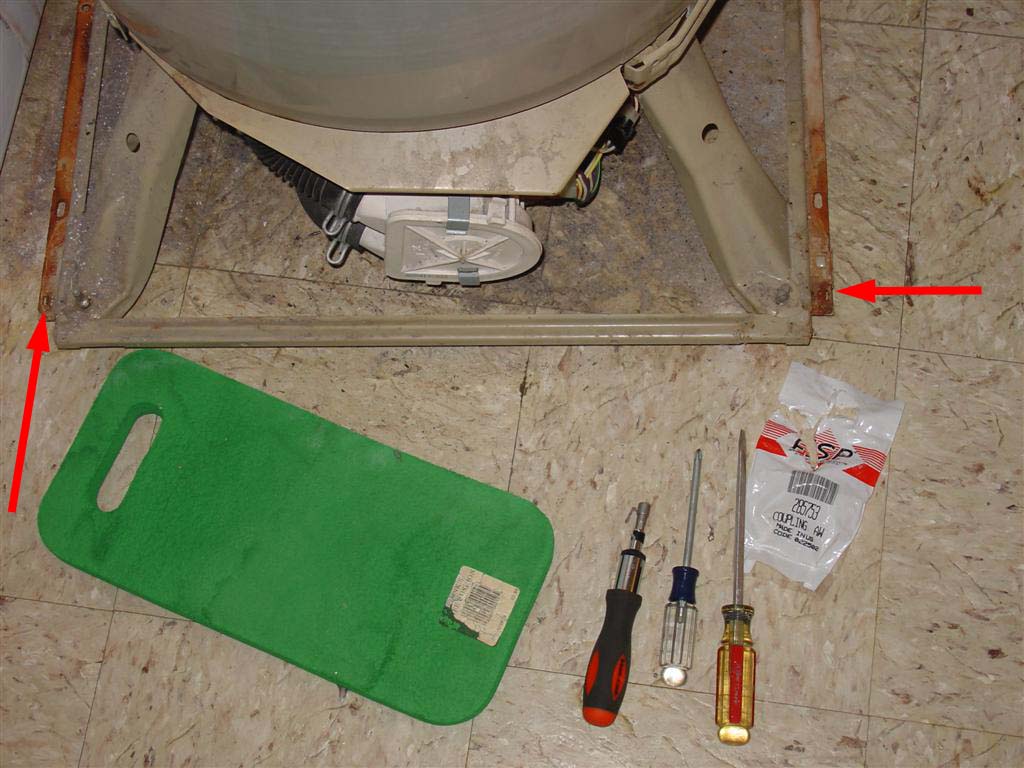
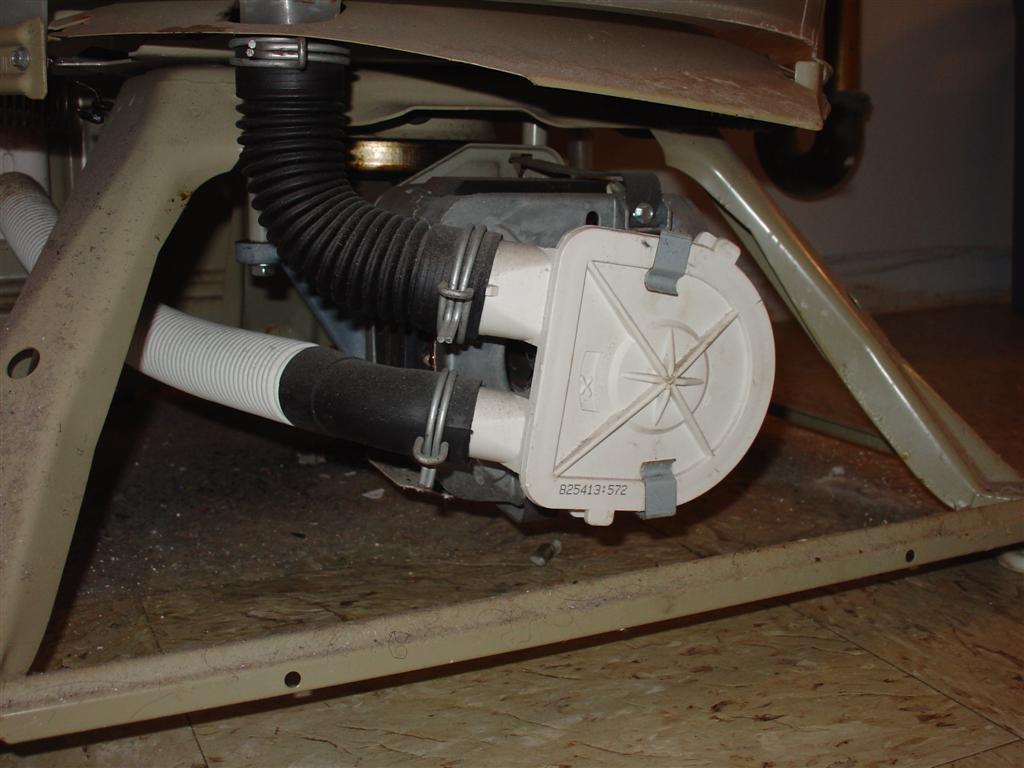
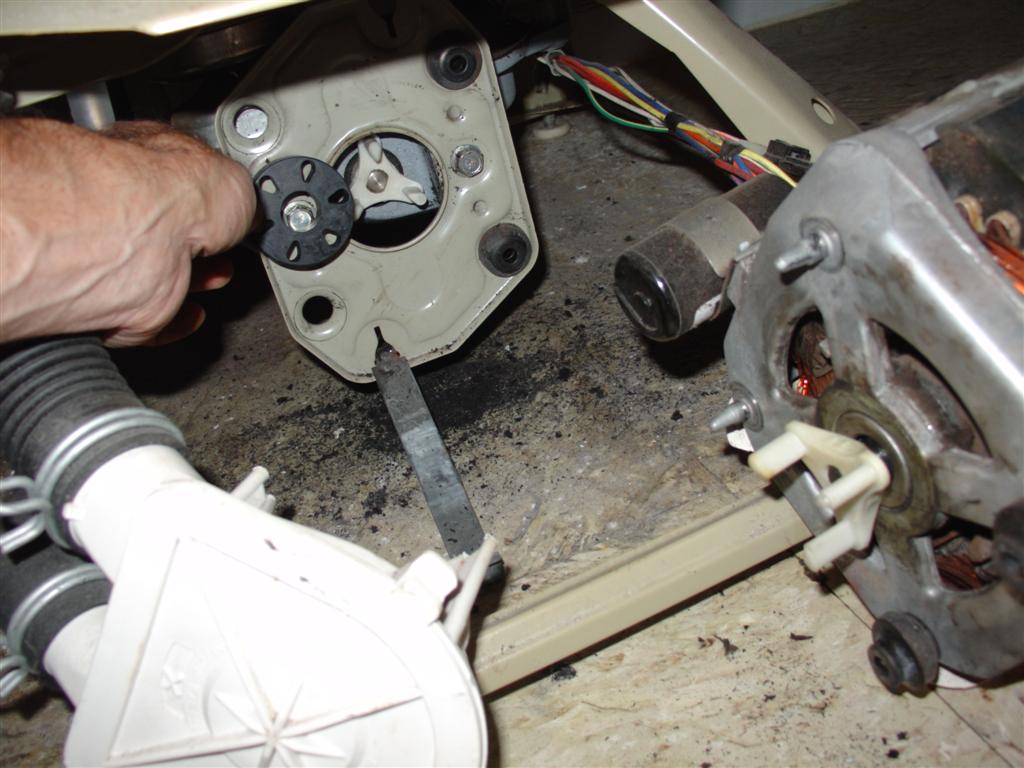
| The cabinet has been removed, exposing the tub, and below the tub, the pump. The pump is the white thing with the hoses attached to it. The motor is behind the pump. | Here I have all my tools lined up along with my new motor coupling. The green thing is a foam rubber pad for kneeling on - another suggestion - it is much easier on the knees than a cold, hard tile floor. If you click this picture you will see two red arrows pointing to the tabs on the washer base that fit into slots on the cabinet. More about this later. | ||||
 |
 |
||||
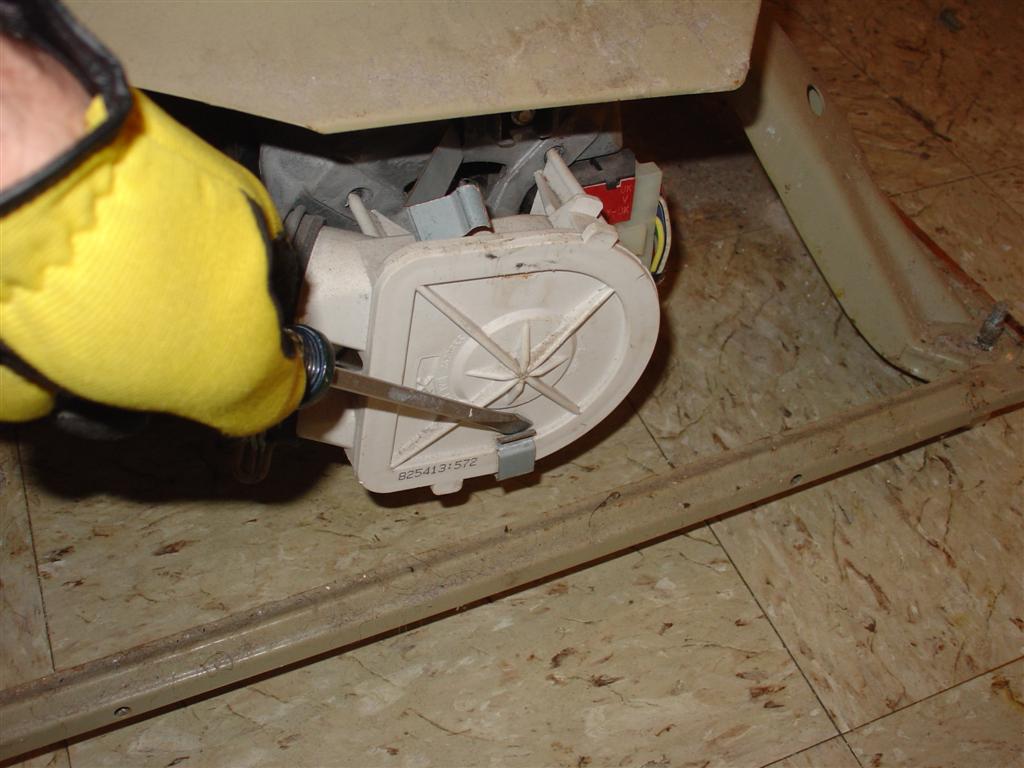
| Detach the pump from the motor. The pump is held to the motor by two metal thumb clips. | Remove the clips. You can use your fingers, but I think its easier to just pop them off with a screwdriver. | ||||
 |
 |
||||
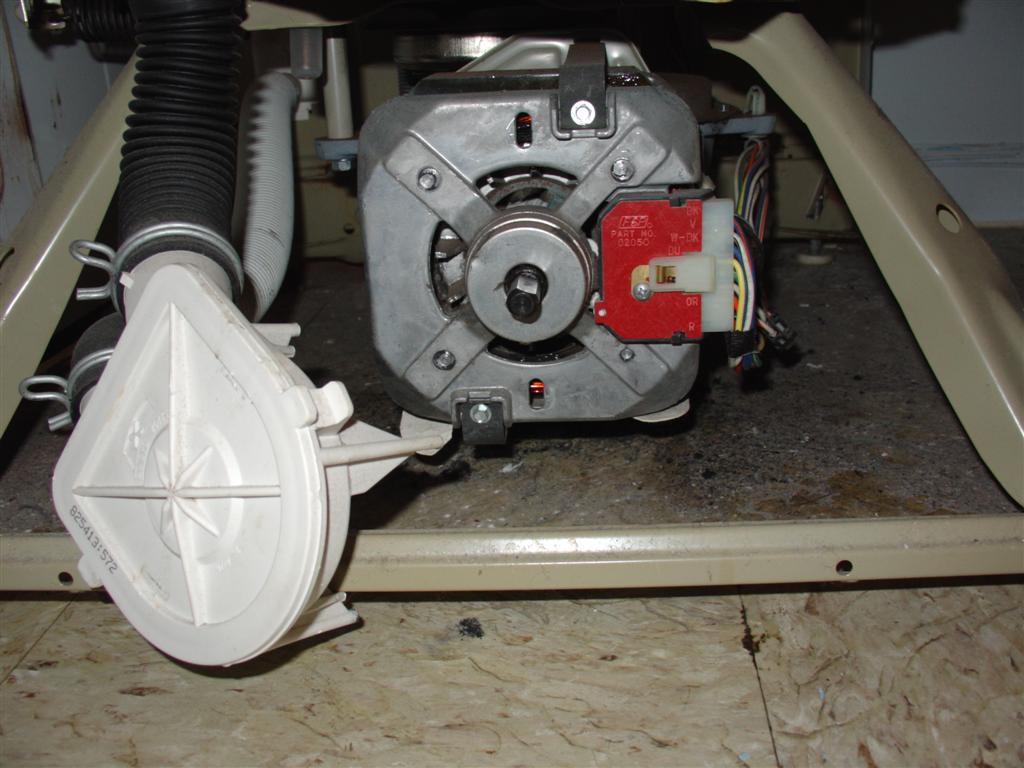
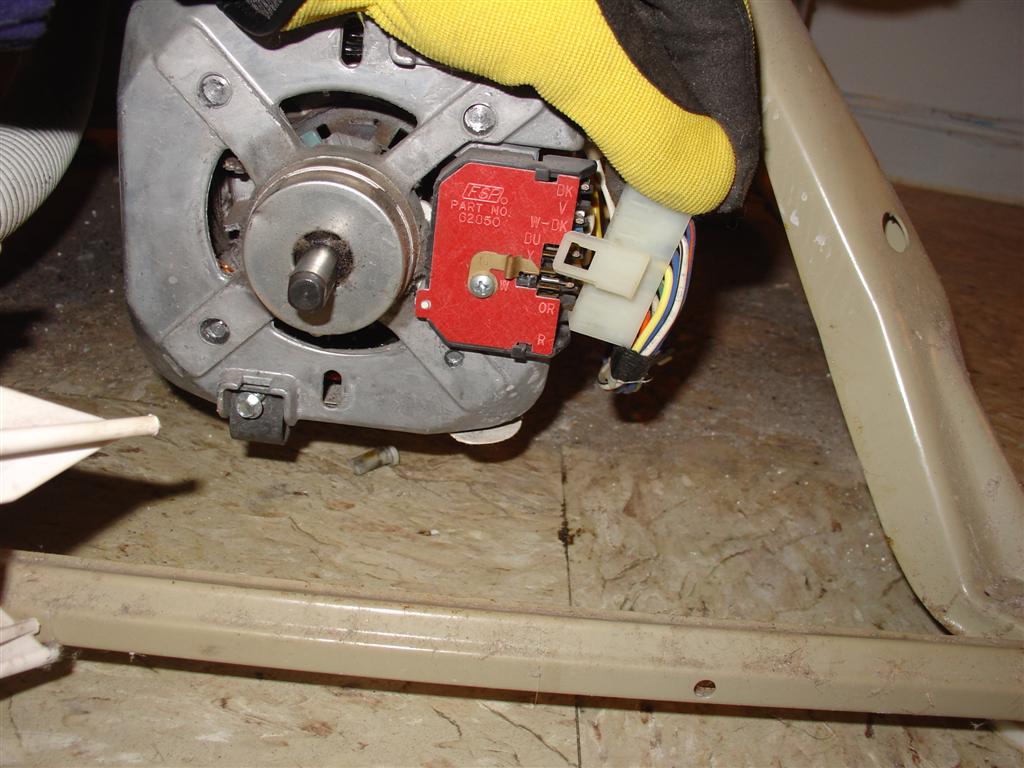
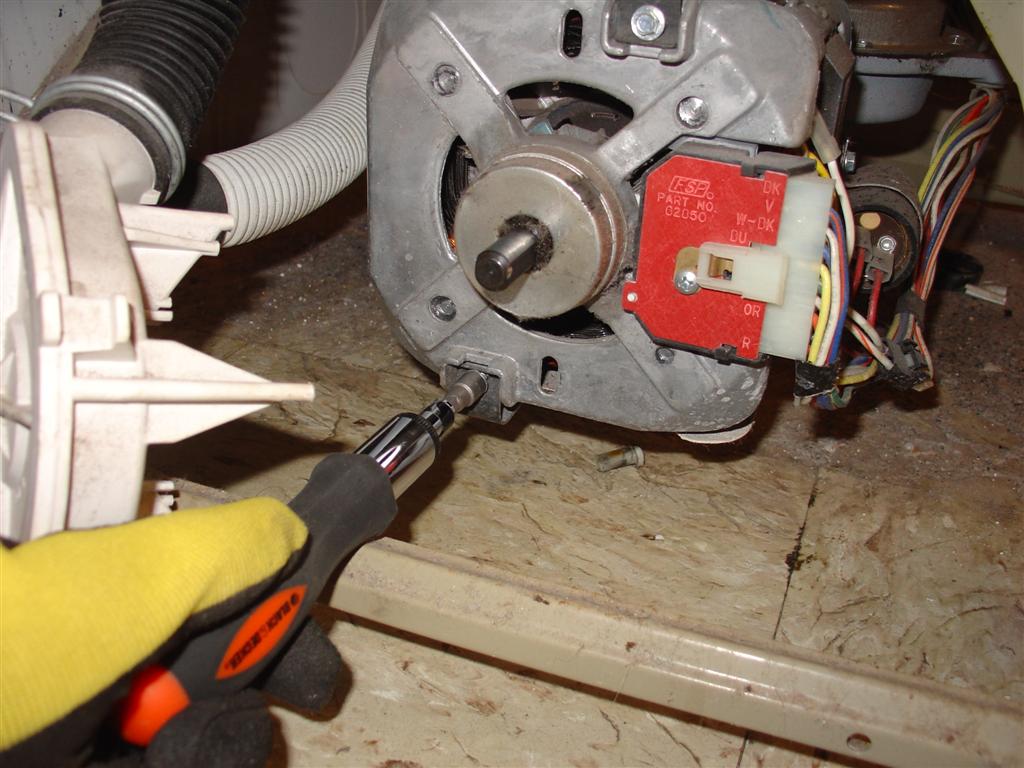
| Pull the pump away from the motor. You do not have to remove the hoses. Put the clips someplace safe where you won't lose them (like maybe with the trim?). | Disconnect the electrical connections to the motor. In addition to the large one shown here, there are a couple of smaller ones behind it. Don't worry about mixing them up. They are all different sizes and only fit one way. | ||||
 |
 |
||||
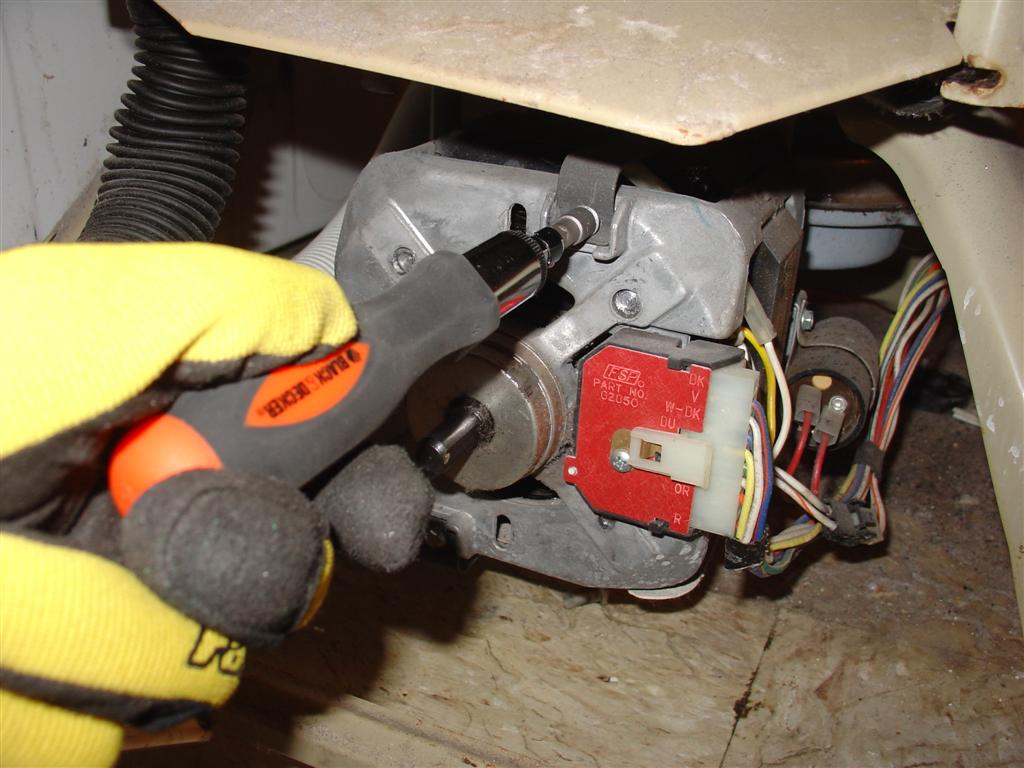
| Now you will need your nut driver or 1/4" socket wrench.
There are two hex head screws securing metal mounting clamps. These clamps
are what actually hold the motor on. Here I am removing the lower screw. Tip: Put a scrap of 2x4 or a couple of hockey pucks under the motor to help support it. |
Removing the upper screw. Actually I don't think it matters
which one you remove first.
Be careful after the screws are removed because as soon as you release the mounting clamps the motor will drop. It is quite heavy, so support the motor underneath so it doesn't fall on the floor. I don't know if that would break it, but I don't want to find out. |
||||
 |
 |
||||
| Here the motor has been
removed and now we can see the broken motor coupling. |
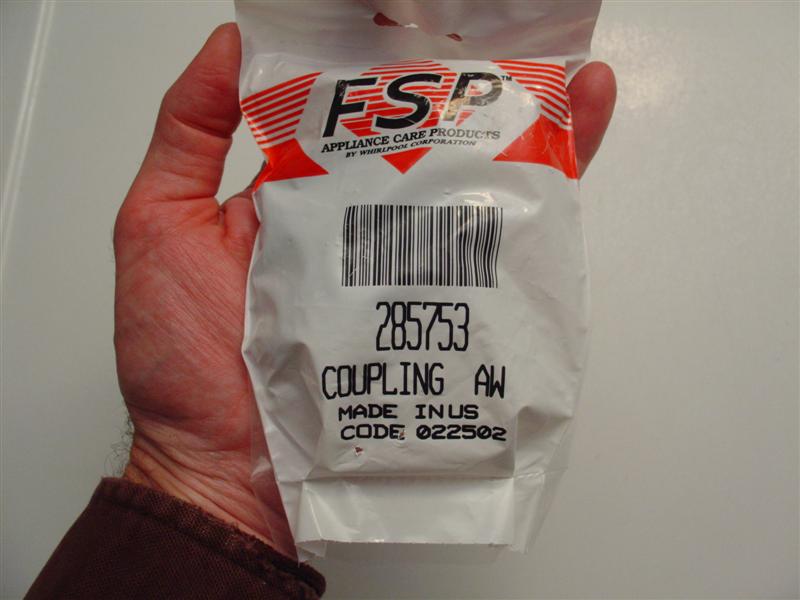
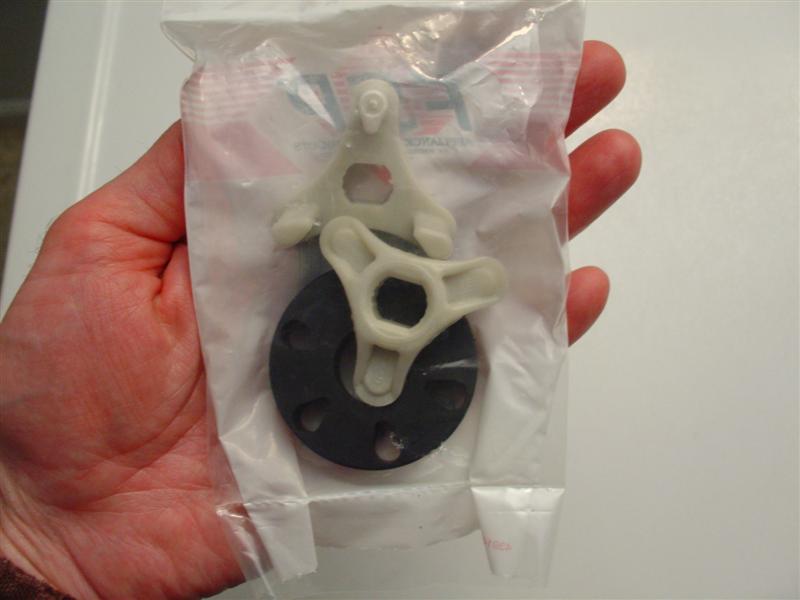
This is the part you need.
The part number is 285753. It is available from a variety of sources, so it
is not necessary to buy it from Sears. Shop around to get the best price,
which is usually well under $10 including shipping. I order
two of these at a time so that I always have one on hand. You never know when the
part will fail, but it will never be at a good time.
Unfortunately, if you are reading this now you probably already have a broken motor coupling, a sink full of wet laundry, and your family anxiously asking you when the washer will be fixed. You need this part ASAP, and you don't have the luxury of shopping around for it. Just get one locally if you can, or buy online with overnight delivery if you must, but do yourself a favor and buy two of them so that you will have a spare for the next time this happens (or God forbid in case you break the part while installing it). |
||||
 |
 |
||||
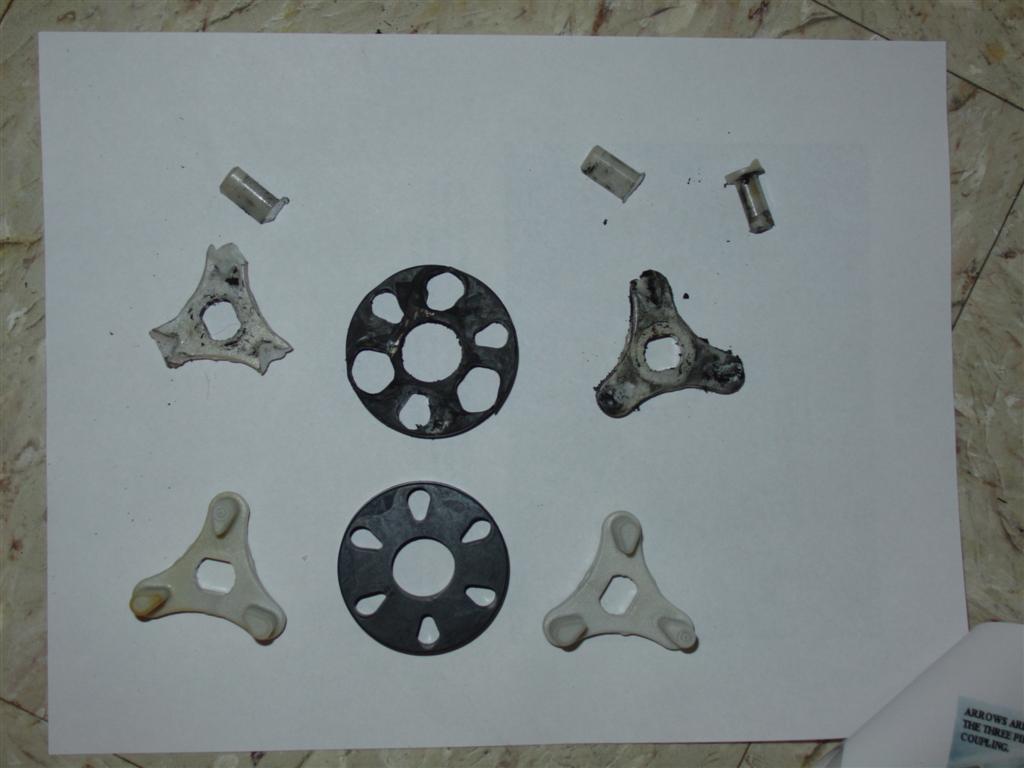
| The new part consists of two hard plastic gears, one of which goes on the motor shaft and the other on the transmission, with a thick black rubber washer between them. This is an older picture. The newer parts have a metal sleeve inside the plastic pieces that mount on the motor and transmission shafts. I'm not sure how that will help since usually it is the prongs that break off. | Here is a picture of the old and new motor couplings. Can you tell which is which? Hint: The teeth have been broken off of the old part. You can clearly see how the rubber has been stretched and distended. | ||||
 |
 |
||||
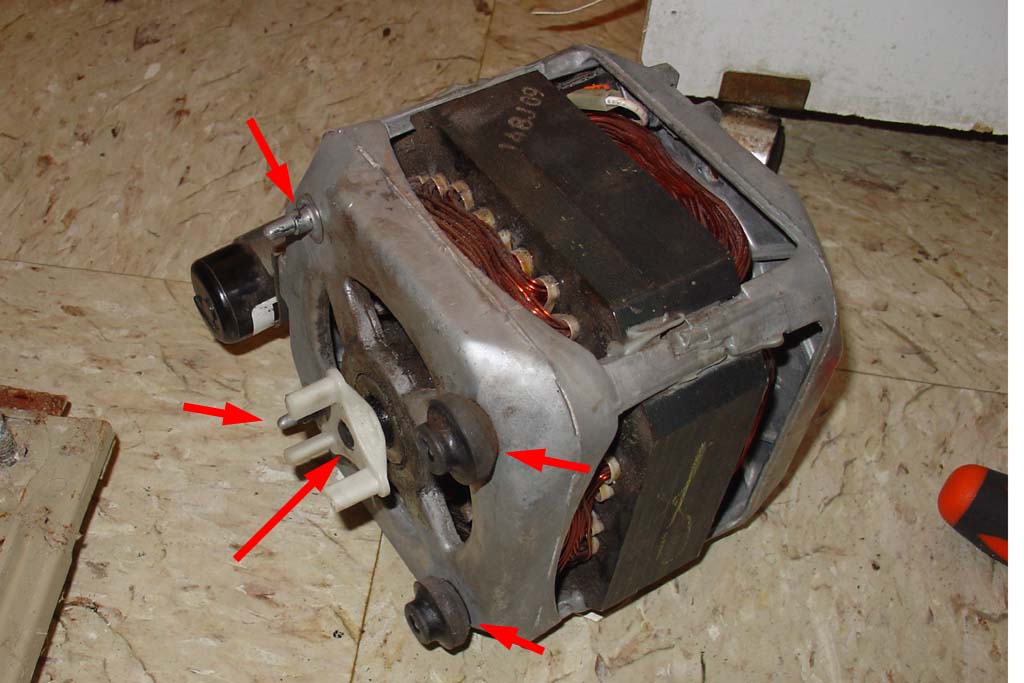
| Here is the motor removed from the washer. I have already
mounted the new motor coupling. Note that two sides of the motor shaft are
flat and two sides of the motor coupler are flat. You want to line them up
and then
very gently tap half of the motor coupler on with a block of wood,
an inverted screwdriver, or a socket wrench extension. Tap, not hammer! When
installed properly, the end of the motor shaft is
flush with the inside face of the motor coupling. Click the picture for a
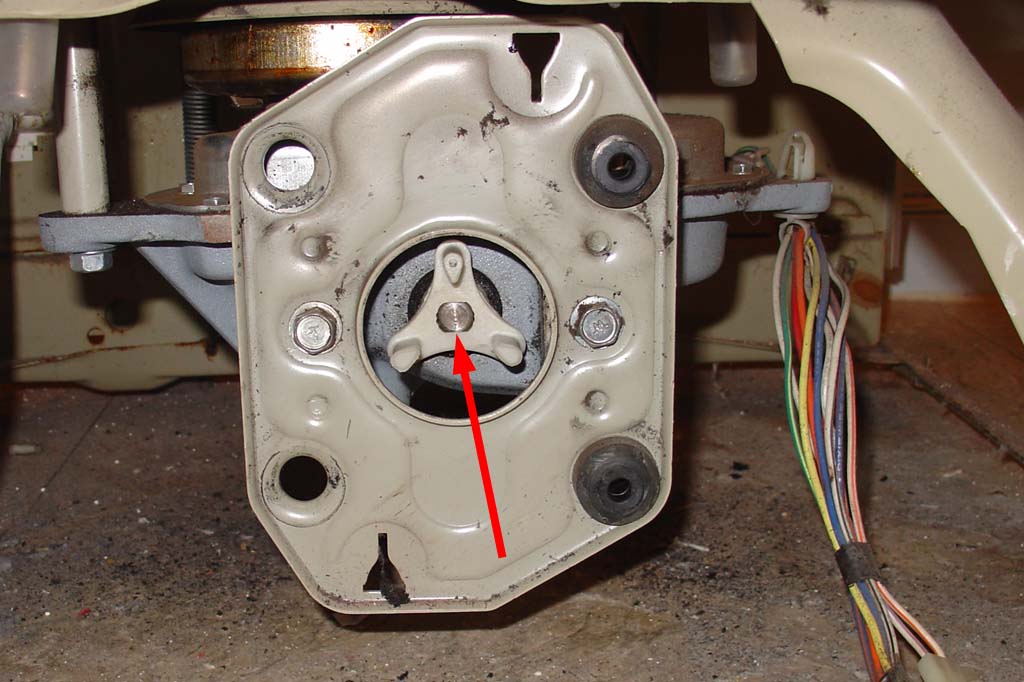
larger view to see what I mean. Also note that there are four metal pins on the face of the motor, and on each of these pins there should be a rubber vibration damper that looks like a small doughnut. When you remove the motor, sometimes these vibration dampers are stuck into the plate on the front of the transmission, and sometimes they fall off onto the floor. In this picture, only the two pins on the right have the vibration dampers mounted, and the pins on the left are bare. |
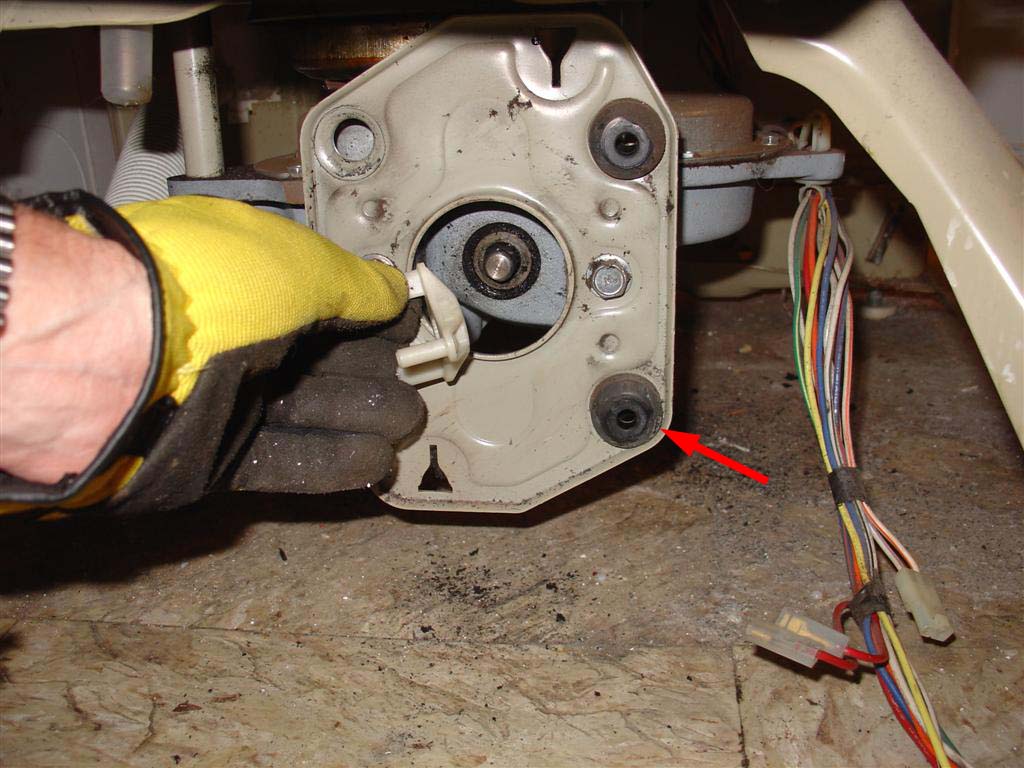
Here I am mounting the other half of the motor coupling onto
the transmission shaft. Note the red arrow pointing to a rubber vibration
damper. The fourth one had fallen off and rolled under the machine. Luckily
I found it, and stuck it on the motor when I remounted it. Just make sure
that when you remount the motor, you have all four vibration dampers where
they belong. I find it easier to put them on the motor when remounting it,
but this is personal preference. Sometimes it can be difficult to get the plastic motor coupling onto either the motor or transmission shaft. If it doesn't want to go, there are a couple of tricks you can try. Soak the plastic parts in hot water for a few minutes prior to mounting. If that doesn't help, try a drop of silicone spray. Make sure the flat sides are lined up. Please don't break the new part, whatever you do! |
||||
 |
 |
||||
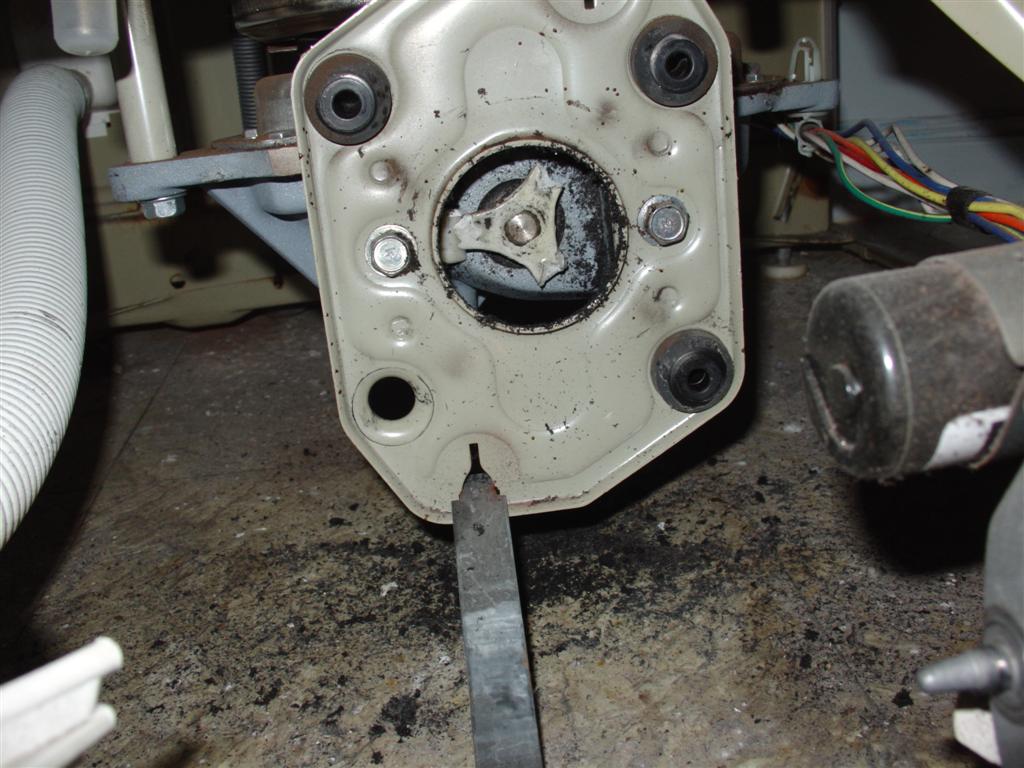
| The motor coupling mounted on the transmission shaft. Once
again note that the end of the transmission shaft is flush with the face of
the motor coupling. This is important. Mounting the motor is a little tricky because you have to get the holes in the black rubber isolator piece to line up with the pins in the motor coupling. You are in an awkward position, guiding the heavy motor in, trying to not let the vibration dampers fall off. I find it easier to put the rubber isolator on the transmission rather than the motor, because then you can see the holes as you guide the motor in. Again, it may help to support the motor with some scraps of wood or something similar so that you're not holding all its weight with your hand. |
Here I am about to fit the black rubber
isolator part of the coupling on to the transmission, and then remount the motor.
To make life easy for yourself, put one of the holes in the black rubber
isolator at the 12:00 (top) position, and rotate the shaft of the motor so
that one of the white plastic teeth is also at the 12:00 position. You will know when the motor is in the correct position mostly by feel. You can also see that the vibration dampers are snug between the motor and the transmission plate. It's not too terribly difficult but it may take a couple of attempts. Be careful, take your time and don't force it. The last thing you want to do is break your new part. Did I mention that I always order more than one of these parts at a time? That's why. |
||||
|
|
|||||
| Once the motor is on, the rest is easy.
Follow my instructions in reverse.
Put the clamps on the motor and secure with the hex screws. Reattach the electrical connections to the motor. Reattach the pump to the motor and secure with the metal clips. |
Next come the final, slightly tricky
part: remounting the cabinet. Put the cabinet back on taking care to slide the lip on the front of the cabinet under the base, and then tilt the cabinet back into position while lining up the metal tabs on the sides of the base of the washer with the slots on the cabinet. Maybe a few more pictures will help. |
||||
 |
 |
||||
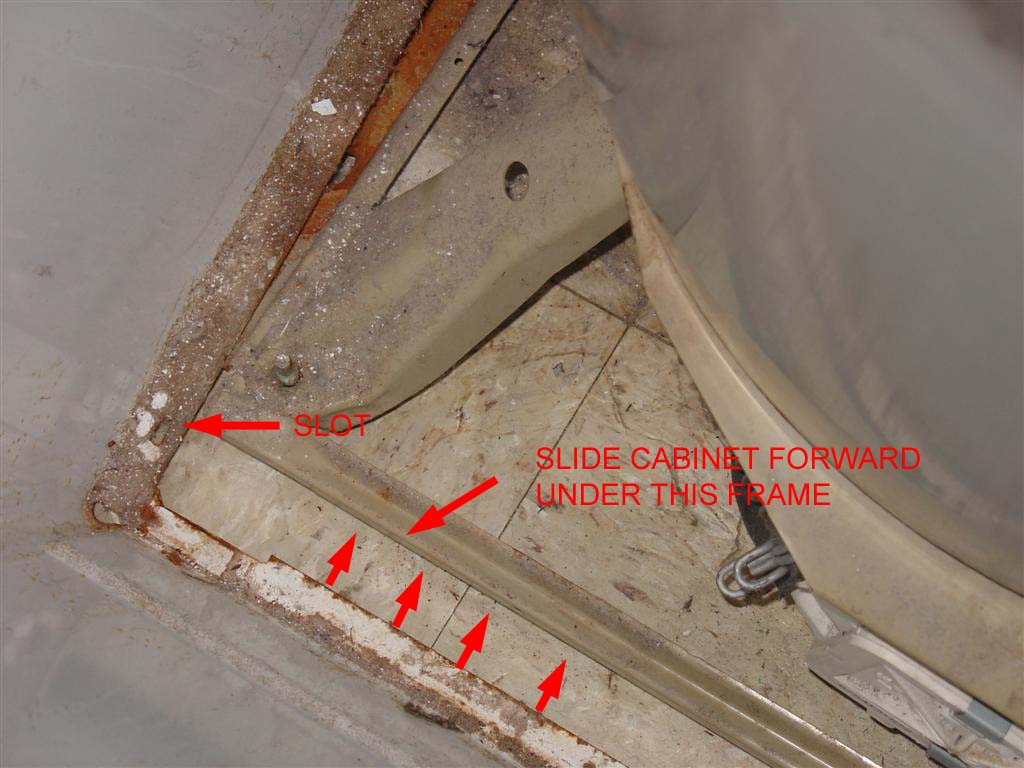
| This is a view from inside the cabinet of the left front corner of the washer. You can see the pump at lower right. What is important to note is the cabinet is tilted forward, and the lip on the front of the cabinet is about to be slid under the front of the frame on the base. Click the picture for more details. I have also highlighted the slot on the cabinet where the tab on the base inserts into. | Here is the same view but now I have slid the cabinet forward a couple of inches, and you can clearly see that the lip of the cabinet front is under the base frame. The cabinet is still tilted slightly forward. All that remains is to lower the cabinet onto the base and make sure the tab and slots are lined up. | ||||
 |
 |
||||
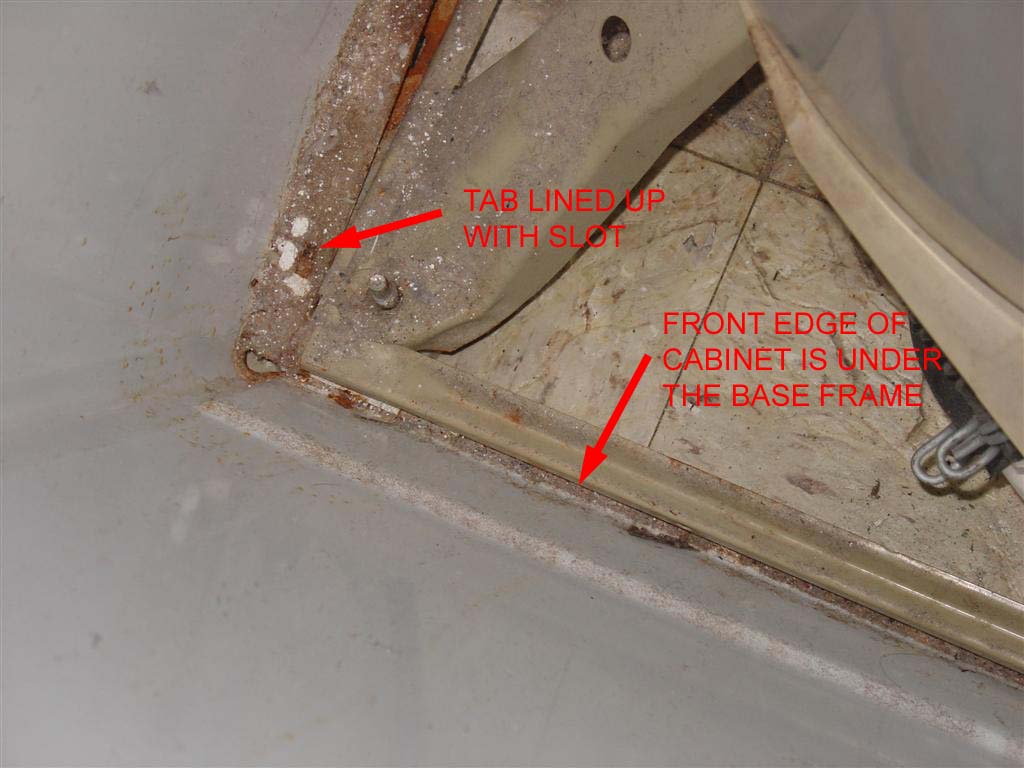
|
Here you can see that the tab and slot are lined up. Lower the cabinet and make sure the back of the cabinet and the rear panel are flush. Reattach the brass colored clips that secure the cabinet to the back panel. You don't need the screwdriver for this. Just press them in with the heel of your hand. Gently lower the control panel and reattach the two screws. Finally, snap on the two pieces of plastic trim. Congratulations! You're done! You've just repaired your washer and saved yourself a bunch of money. Isn't that a nice feeling? Be sure to read my tips for best washer performance. |
You are back in business and ready to wash! TIP: The primary causes of premature motor coupling failure are overuse of the heavy duty cycle and overstuffing the machine. Fill your machine only to the top of the agitator blades and DO NOT pack your clothes down! Your clothes won't get clean, and you risk breaking the motor coupling. If you have too many clothes for one load, do a second load. Heavy duty cycle is really hard on your clothes and also puts unnecessary stress on the machine. Use it only when necessary, not all the time. Follow these simple rules and your motor coupling will last for years! |
||||
I am happy to provide this information for free, so please do not feel obligated, but it does cost me money to maintain this website. If I've helped save you time, money, and a little aggravation and you'd like to say thanks with a small donation, I really do appreciate it.
| Home |